Inspection
/blog_hero_water_damage.webp?width=727&height=404&name=blog_hero_water_damage.webp)
The process of inspecting and reporting on residential water intrusion can be a complex and challenging task. That’s because water can enter a home in any of a number of ways – through the roof, the walls, the foundation, slab floors, doors and windows, or even leaky indoor plumbing. Below, we list a few best practices to consider.
Create Your Own Moisture Inspection Checklist
Ideally, you’ll want to create a digital checklist ahead of time. This will help guide you through a moisture intrusion inspection, so you can be certain not to overlook anything.
The best way to create this sort of checklist is with a digital tool – i.e., a software app loaded onto on your mobile phone or tablet. After you create your custom checklist, then you can easily reuse it for any new jobsite where you have to perform moisture intrusion detection. That means there’s no need to carry a pen, a paper checklist and a clipboard. And there’s no worry about damaging or losing an important paper document.
How to Select an App: Choosing the right software app is an important decision. So what kind of app do you need, exactly, in order to create a custom checklist? You may be surprised to learn that a good floor plan app will let you create checklists and forms in addition to other home inspection documents. Think of it as a “Swiss army knife” type of tool for completing your home inspections.
Take Essential Physical Tools to Each Jobsite
You’ll want to arrive well-equipped when you pull up to a home that needs inspecting. So, be sure to take a complete arsenal of tools to get the job done right – including a flashlight, hygrometers, an infrared camera, moisture meters and other job-specific devices. All of these will be necessary in order to complete a thorough inspection, and may also prevent the need to perform invasive moisture intrusion testing.
Pro Tip: Be sure to read our companion article titled “One Dozen Helpful Tools for Finding and Documenting Water Damage.” We included a link to that resource at the end of this article.
Start Conducting Your Inspection on the Inside
Begin by examining the interior of the home to look for any visible signs of moisture intrusion. These could be discernable areas of dampness, stains or discoloration on walls or ceilings, obvious pools or puddles of water, or indications of mold growth. If you find evidence of moisture intrusion, do your best to try to determine probable sources and entry points./blog_measurement_02.webp?width=730&height=410&name=blog_measurement_02.webp)
Some Moisture May Be Hidden from View. So, you will also need to inspect for concealed leaks and inconspicuous dampness, such as moisture lurking inside walls or under flooring. Here’s where your moisture meters and infrared camera will come in handy. Moisture meters can detect moisture in materials such as wood and drywall, and an infrared camera can detect variations in temperature that may indicate water intrusion.
Document Your Interior Inspection as You Go
Your floor plan app is perfect for this task! In fact, it’s an ideal data-gathering tool. Here’s how it works: You can use the app to quickly scan and sketch each room before you inspect it. Then easily add notes and attach photos to document your findings about the presence or absence of moisture. You can even combine room sketches to create a complete floor plan for each level of the home.
Key Point: Again, using an app like this is much faster and easier than taking notes with a pen and paper. Plus, your information is presented in a visual way that is much more professional-looking than a mere written report, and also a lot easier to understand.
Conduct an Inspection of the Home’s Exterior
Surveying the outside of the structure will allow you to further identify and document probable entry points of moisture intrusion. This will require a thorough inspection of the home’s outer envelope. That includes the roof, gutters and downspouts, siding/cladding, foundation, windows, doors, vents, seals, and weather stripping.
Note: Specialized tools may be helpful for this stage of the inspection as well. For example, you may prefer to use a drone to inspect the roof, instead of climbing up there on a ladder and risking a fall.
Produce a Report Before You Leave the Jobsite
This is another key advantage of using a floor plan app: While you’re still on location at the jobsite, you can convert your completed floor plan into a branded, PDF photo-report document. And then you can forward that document to the proper parties before you drive away. That means your job at that home will be finished, with no remaining work to be completed later back at your office.
Your Report is Important: (1) It will inform and enlighten all individuals who are interested in the home’s current condition and value. (2) It will serve as a helpful guide for any mitigation or restoration work that you recommend. (3) It will be easy for you to access and retrieve, in case you are called upon to answer any follow-up questions. (4) It will demonstrate your skills and professionalism to help you win more jobs in the future.
Conclusion
Overall, inspecting and reporting on residential moisture intrusion requires proper tools, careful attention to details, thorough documentation, and rapid, reliable reporting. By following the best practices listed above, you can ensure that your entire process is efficient and effective – with results that paint an accurate picture of the extent of moisture intrusion.
CHECK OUT THESE RELATED ARTICLES ABOUT RESIDENTIAL WATER DAMAGE:
One Dozen Helpful Tools for Finding and Documenting Water Damage
7 Reasons to Create a Digital Floor Plan Sketch During Water Damage Assessment
What to Include in Professional Water Damage Reports

Zuzanna Geib
Team Lead Marketing
Uncovering Hidden Moisture
The Ultimate Guide to Inspecting and Reporting on Moisture Intrusion.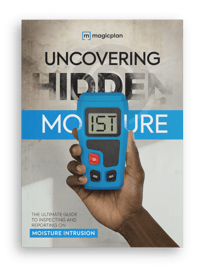

Share article