Restoration
 Fires, storms and frigid temperatures can wreak havoc on homes, harming structures, finishes, furnishings, electronics and other valuable contents. When resulting disaster damage is extensive and more than a homeowner can handle, the situation requires quick attention. Your primary goal, of course, is to help the homeowner deal with the devastation. That requires a lot of different processes – and one of the most critical processes is proper documentation.
Why Proper Documentation in Disaster Restoration Is Important
Four reasons:
-
It helps the homeowner come to terms with the crisis, file an insurance claim and achieve resolution.
-
It helps the insurance adjuster manage the insurance claim and negotiate a settlement.
-
It helps you prepare a work contract.
-
It helps to protect your company if any litigation issues arise after work is completed.
How to Ensure Thorough, Consistent Documentation
This can be achieved by having a clear set of company standards and best practices, and also training employees to adhere to those. Ideally, your company standards and best practices should follow disaster restoration industry guidelines, such as the ANSI/IICRC S500 Standard for Professional Water Damage Restoration.
TIP: Create a Standard Operating Procedures (SOP) manual that provides step-by-step instructions for documenting disaster restoration projects.
When Documentation Should Take Place
Documentation of natural disaster damage should begin just as soon as your company is notified about it, and should continue through the following phases:
- Immediate walk-through for inspection and disaster damage assessment
- Rapid, detailed damage reporting
- Contract review and signing
- Mitigation/restoration with progress reporting
- Post-work review and wrap-up
TIP: Make “Daily Documentation” your company motto, and convince your crew to live it and breathe it
Which Tools Are Needed at the Initial Walk-Through
The basics include:
-
A DSLR (digital single-lens reflex) camera, or a mobile device with a good-quality camera
-
A laser measuring device
-
Moisture meters and thermal imaging cameras for detecting water damage
-
A device for recording notes (some professionals like to use a voice-to-text app)
-
A mobile-device app that allows you to create accurate 2D and 3D floor-plan sketches onsite, instead of drawing sketches by hand
TIP: If you choose a floor-plan app that is more advanced – one that also lets you create a photo report and an estimate in a matter of minutes – that’s even better. A multi-functional app can be a game changer for increasing your productivity.
Read more: Why Warren Restoration replaced ‘the industry standard software’ with magicplan
What Types of Legal Documents Are Required
This will be dictated by current state laws. So, be sure to create and share any specific legal documents required by law in a project’s jurisdiction. For example, under Illinois law pertaining to home repair and construction, the homeowner must request – and the contractor must provide – a written list of the names and addresses of "all parties furnishing materials and labor and of the amounts due or to become due to each." This list, or affidavit, must appear either as part of the contract or in a separate printed statement. Other states will have their own specific requirements.
TIP: Visit your state attorney general’s website and search for information pertaining to contractors.
What to Document When Working on a Project
The rule of thumb is “document everything.” That may include all of the following:
-
Meaningful communication (conversations/correspondence) pertaining to the project
-
Administrative information
-
Meaningful observations at the job site
-
Public records of the event that damaged the property
-
Police/first-responder reports, if applicable
-
Efforts to secure and protect the property
-
Work-related documents (contracts, permits, change orders, etc.)
-
Homeowner’s insurance information
-
Damage assessment (cause of loss, resulting damages, floor plan, inventory of contents, possible extent of area affected)
-
Visuals of the damage
-
A floor plan that helps the homeowner and the adjuster understand the severity of the loss
-
Recommended measures for returning the property to pre-event working order
-
Scope-of-work estimate specifying disaster restoration services and equipment to be used
-
Receipts for any job-related purchases of materials and supplies
-
Deposits and other payments
-
Weather delays or other issues your crew encountered
-
Water-extraction/drying equipment and monitoring
-
Cleaning equipment, supplies and methods
-
Disaster restoration equipment, tools and methods used throughout the project
-
Adherence to your company’s standards and best practices (because proof of conformity demonstrates professionalism and thoroughness)
-
Detailed progress notes and visuals (field reports)
-
Final walk-through and reevaluation
-
Proof of project completion
TIP: Consider including this list (or a modified version of it) in your SOP manual.
Reasons to Capture a Lot of Pictures
You may end up taking hundreds of pictures when recording natural-disaster damage at a customer’s home. And that’s okay. Here’s why:
-
Photo Documentation Is Necessary for Claim Review and Settlement. Visual evidence is the cornerstone of insurance claim approval. Adjusters expect it and depend on it. The same goes for FEMA; if the homeowner applies for FEMA assistance, photo evidence is required.
-
Photo Documentation Plays a Critical Role in Getting a Homeowner’s Approval. It clarifies and supplements written information, so the homeowner can understand and agree to all work that needs to be done.
-
Photo Documentation Is a Good Risk-Management Practice That Helps Protect Your Business. If a homeowner raises questions or concerns after work is completed, you can use visuals to repaint the picture of the initial damage and to prove you met your contractual obligations.
TIP: Store your pictures in a hard-drive folder with the job name or number, and use a systematic approach to organize all of the visuals (perhaps with a subfolder dedicated to each room).
How Long to Keep Documents
Check with your state regarding the required timeframe to keep all legal records.
TIP: Invest in a reliable backup storage system for your documentation – i.e., an extra hard drive or server or cloud storage account.
Conclusion
Whenever your company responds to a residential crisis involving natural disaster damages, remember this: proper documentation is a key process for operational success. Do it well, and the final outcome is more likely to be good for your business… and good for your customer.
Discover how magicplan can help you with documenting natural disasters faster and quicker by using our new photo report feature
Or read how our customers Discreet Restoration and Crown Restoration save significant time with magicplan.

Zuzanna Geib
Team Lead Marketing
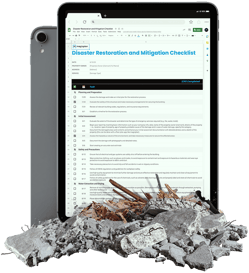
Disaster Restoration & Mitigation Checklist
Stay prepared for any disaster job and ensure a quick and effective response with this comprehensive checklist.

Share article