Claims Adjuster
/Restoration
/Inside magicplan
For restoration and insurance claim professionals, integrating magicplan with CoreLogic (formerly Symbility) can significantly enhance the estimation process. This guide details the steps to use both platforms effectively, focusing on creating sketches in magicplan and incorporating them into CoreLogic claims.
1. Setting up a Claim in CoreLogic
2. Enabling the Integration in magicplan
3. Creating an Instant Sketch Using LiDAR
4. Downloading the Sketch FML File
5. Uploading Your Sketch to CoreLogic Claims Connect and Mobile Claims
6. Sending Your Project Photos to CoreLogic
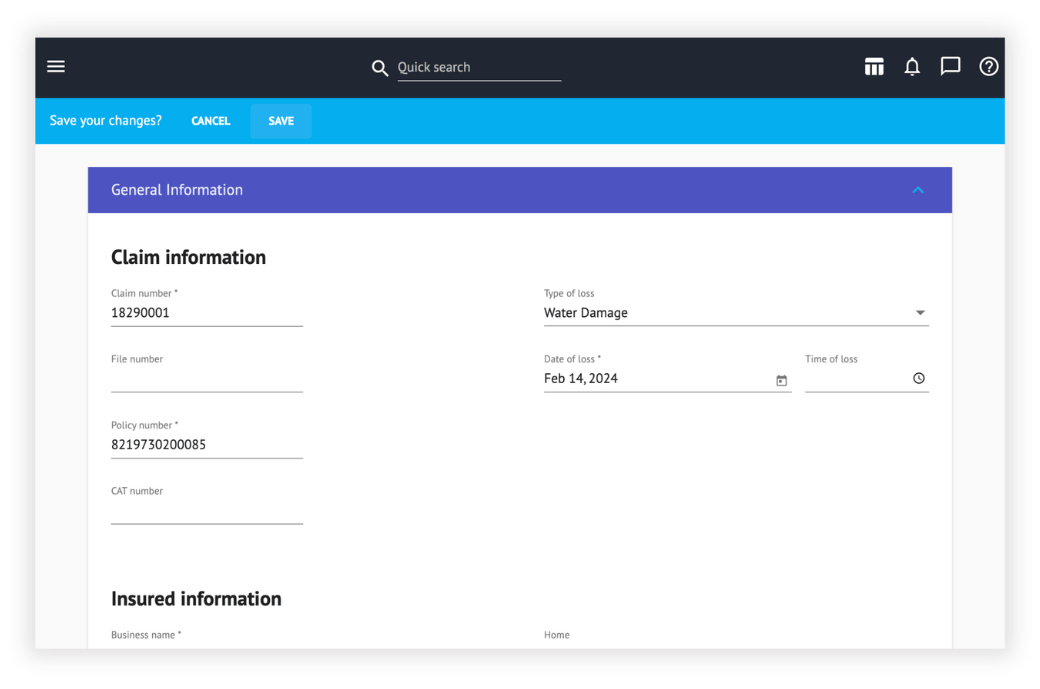
Step 1: Set Up a Claim in CoreLogic
Before tapping into the power of magicplan, initiate your project within CoreLogic to ensure a seamless workflow:
- Log into CoreLogic Claims Connect: Access your account to begin the process.
- Create a New Claim: Select the button or option to create a "New Claim." Provide necessary loss summary information, such as claim number, policy number, type of loss, date of loss, and location, to organize and manage the project within CoreLogic efficiently
Step 2: Enable Integration in magicplan
With your project set up in CoreLogic, the next step is to prepare magicplan for integration:
- Access the magicplan Cloud: Navigate to the "API & Integrations" section in the magicplan Cloud.
- Activate CoreLogic Integration: Locate the CoreLogic option and enable it, setting up magicplan to create and export sketches as FML files.

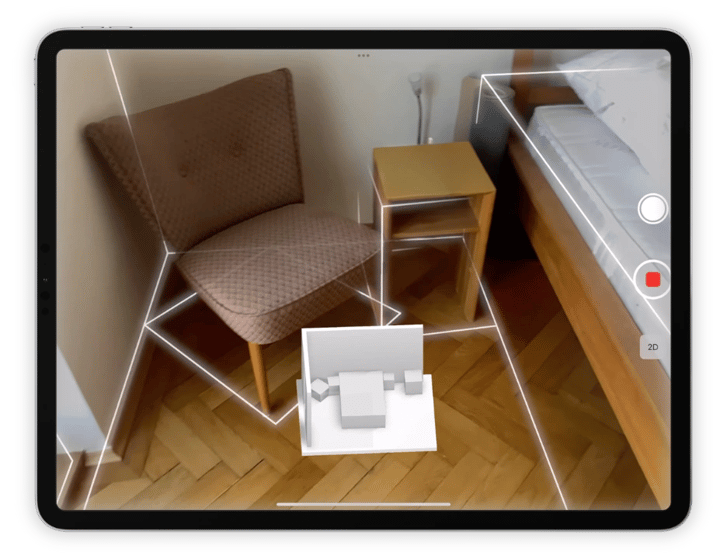
Step 3: Create an Instant Sketch Using LiDAR
magicplan's user-friendly interface and powerful technology make creating accurate property sketches straightforward:
- Start a New Project in magicplan: Create a new project in the app and enter the details.
- Scan and Sketch: Use magicplan’s AR scanning to capture the property layout, automatically generating a detailed sketch.
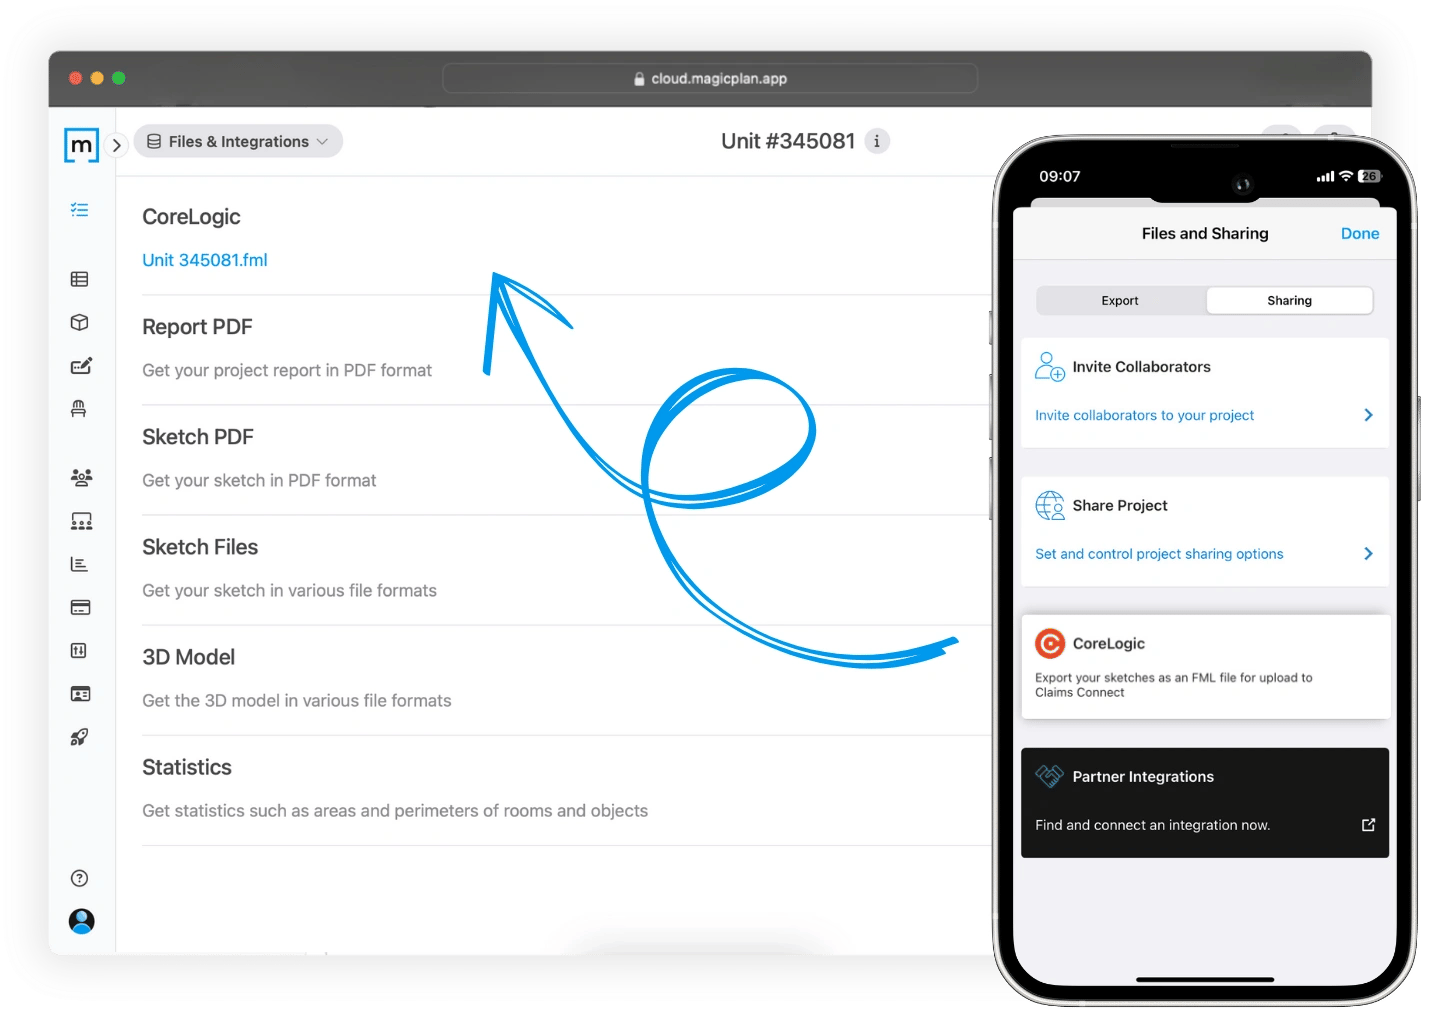
Step 4: Download the Sketch FML File from magicplan
Once your sketch is complete, preparing it for CoreLogic is simple:
- Export Your Sketch: From the project's dashboard, tap "Files & Sharing", then the "Sharing" tab, and select the "CoreLogic" section to generate an FML export.
- Download the File: An email from magicplan will notify you when the export is ready. Download the FML file from the magicplan Cloud to your computer.
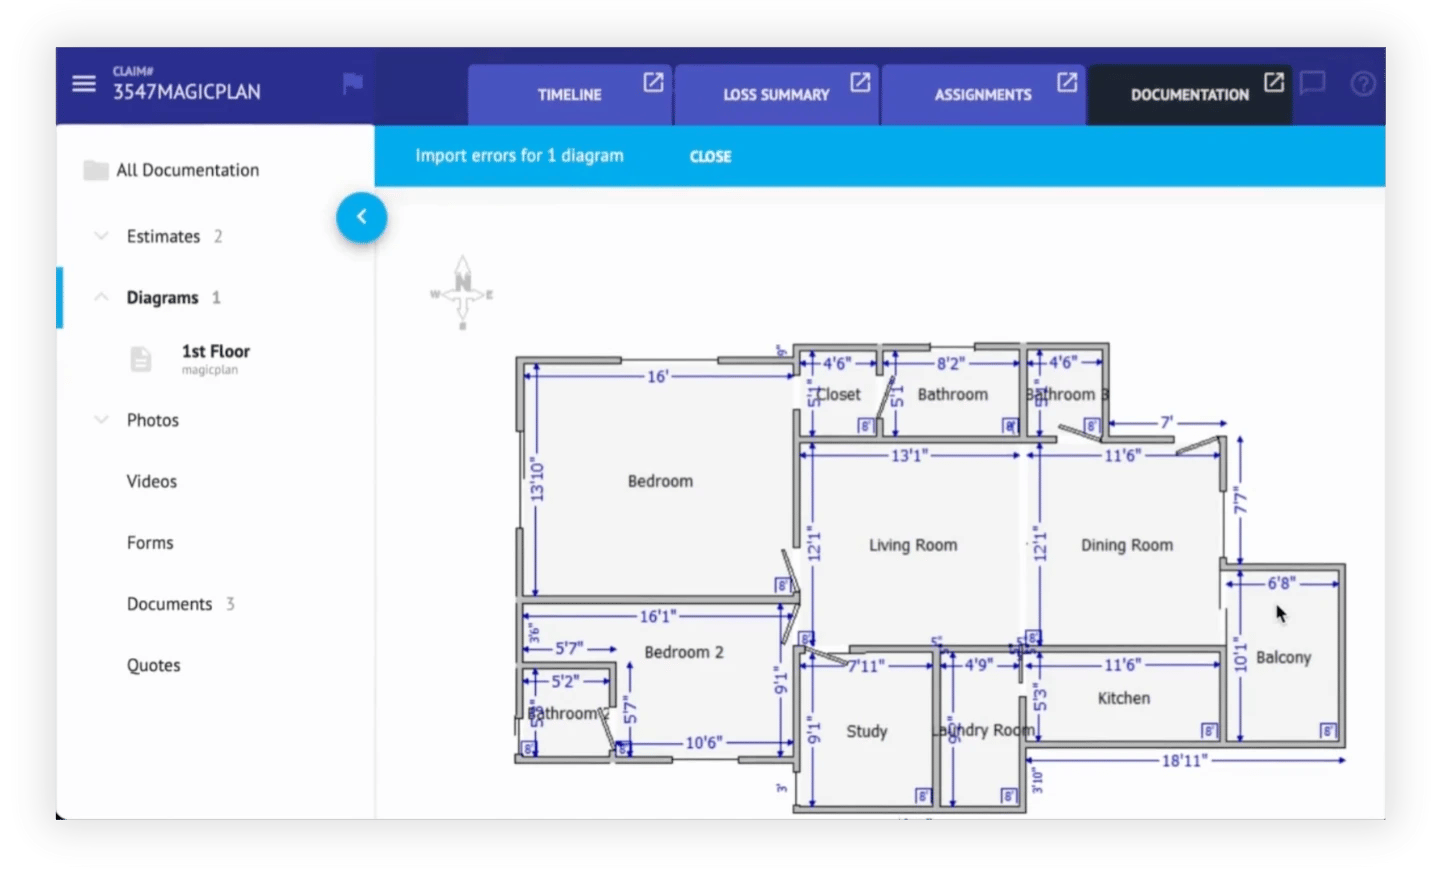
Step 5: Upload your Sketch to CoreLogic Claims Connect and Mobile Claims
The final step involves integrating your detailed sketch into your CoreLogic project:
- Navigate to Your Project in CoreLogic: With your FML file, log into CoreLogic and access the corresponding claim.
- Upload the Sketch: Click "Documentation", select "Diagrams", then "Import Diagram". Choose "Import a diagram XML or FML file" and upload your saved FML file. Your floor plan will now be available in CoreLogic Claims Connect and CoreLogic Mobile Claims.
Extra: Send Your magicplan Project Photos to CoreLogic
- Export Photos: If needed, download a zip file of your magicplan project photos to upload into CoreLogic.
By following these steps, you can efficiently incorporate detailed magicplan sketches and photos into your CoreLogic claims, enhancing the management of your restoration or insurance claims process and the accuracy of your estimates. This integration not only streamlines documentation but also enriches the project data, contributing to a more organized and effective workflow.
READ MORE:
Advanced Field Documentation: Elevating Project Reports
Simplify Your Claims Process with magicplan and Xactimate® Integration

Benjamin Brown
Sales Consulting Manager
Blueprint to Faster Mitigation Estimates Guide
Learn how to master Xactimate® for mitigation estimates.

Share article