Claims Adjuster
/Restoration
/Inside magicplan
If you work with restoration projects or insurance claims, you know how crucial it is to complete tasks as quickly and efficiently as possible. Just imagine being able to create a sketch, take photos, and send everything directly to Xactimate® within minutes, without having to wait for hours to get your sketches back. This means you won't need to upload any ESX files, which makes the entire process of documenting damage and creating estimates much faster directly from the field. In this guide, I will take you through the entire process of how to:
- Create a Claim in Xactimate®
- Start a Project in magicplan
- Send a magicplan Sketch and Photos to Xactimate®
- Benefits of the Integration
Creating a Claim in Xactimate®
Before diving into the details of a property, setting up your claim in Xactimate is the first step. This ensures all the work you do next is neatly tied to the right file from the beginning. Here’s how to set up a new claim project:
1. Launch Xactimate: Start by opening Xactimate on your browser on a Windows desktop.
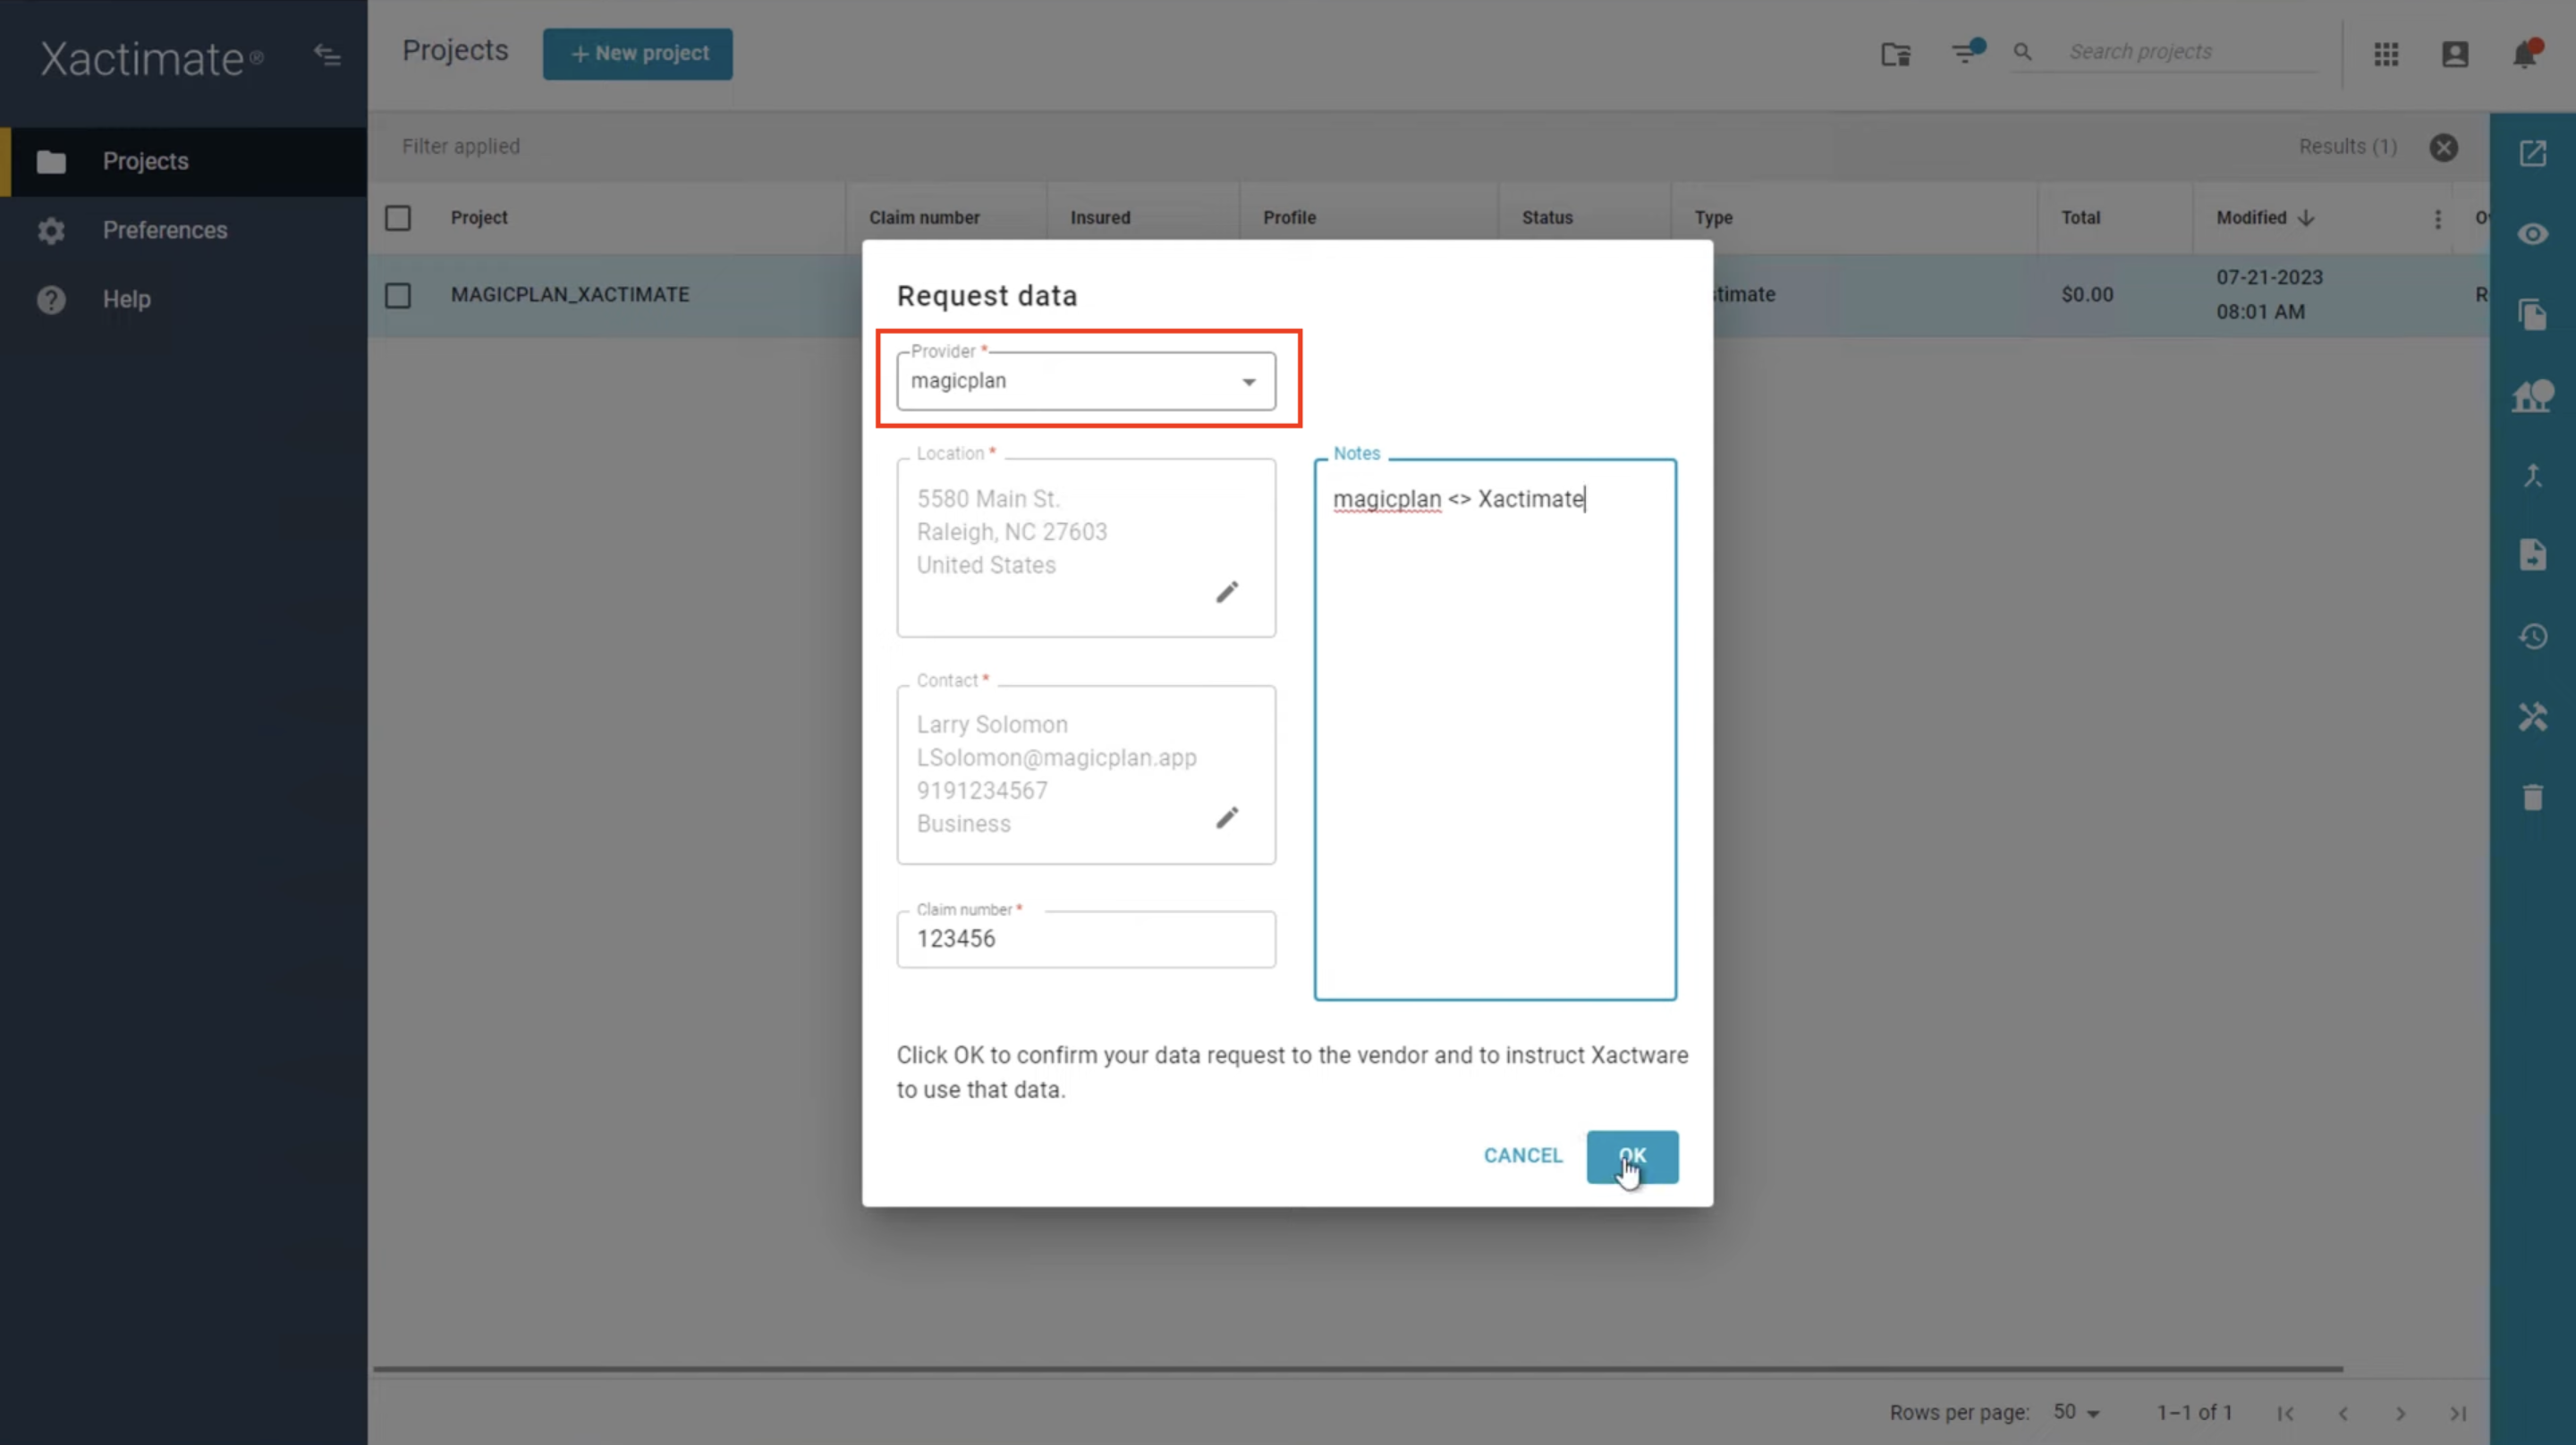
2. Create a New Project: Once in Xactimate, look for the ‘Projects’ tab. Its location may vary depending on your version, but it's typically easy to find on the main dashboard or under the menu. This action opens a form or wizard where you’ll input the details of the claim.
3. Fill in Claim Details: Enter all required information about the claim, such as the claim number, policyholder's information (name, address, contact information), and any additional notes.
4. Select the Provider: Now, you need to select magicplan from the "Provider" drop-down menu and click "Save." Once saved, an alert will confirm that "Your request was processed successfully."
Now that your project is ready, head over to the magicplan app to continue.
Starting a Project in magicplan
Using magicplan to scan a property layout not only saves time but also enhances the precision of your floor plans. In this part of the guide, I'll explain how to create a real-time sketch of the site within minutes.
Creating an Instant Sketch
1. Open magicplan: Launch the app on your smartphone or tablet. Download it from the App Store or Google Play Store if you haven't done so yet.
2. Create a New Project: Tap the ‘+’ sign or select the option to begin a new project. You might need to enter basic details like the project name or address. Using the claim number or a distinct identifier related to your Xactimate claim helps in keeping everything organized.
3. Select the AR Scan Option: Within your project, select the option to add a room using the Auto-Scan option if you're using an iOS device with LiDAR support; otherwise, choose the manual scan option.
4. Start the Scan: Follow the prompts on your screen to start scanning the room. This involves moving your device around to capture the layout of walls, corners, and openings. The app provides visual cues throughout this process, indicating where to point your device and when to move.
5. Adjust as Needed: Once the scan is complete, magicplan offers the option to tweak the generated sketch for greater accuracy. You can reposition walls, modify dimensions, or insert features such as doors and windows if they weren't automatically included.

Taking Photos During the Scan
When scanning a room with magicplan, seamlessly integrating photos into your workflow is straightforward and crucial for detailed documentation:
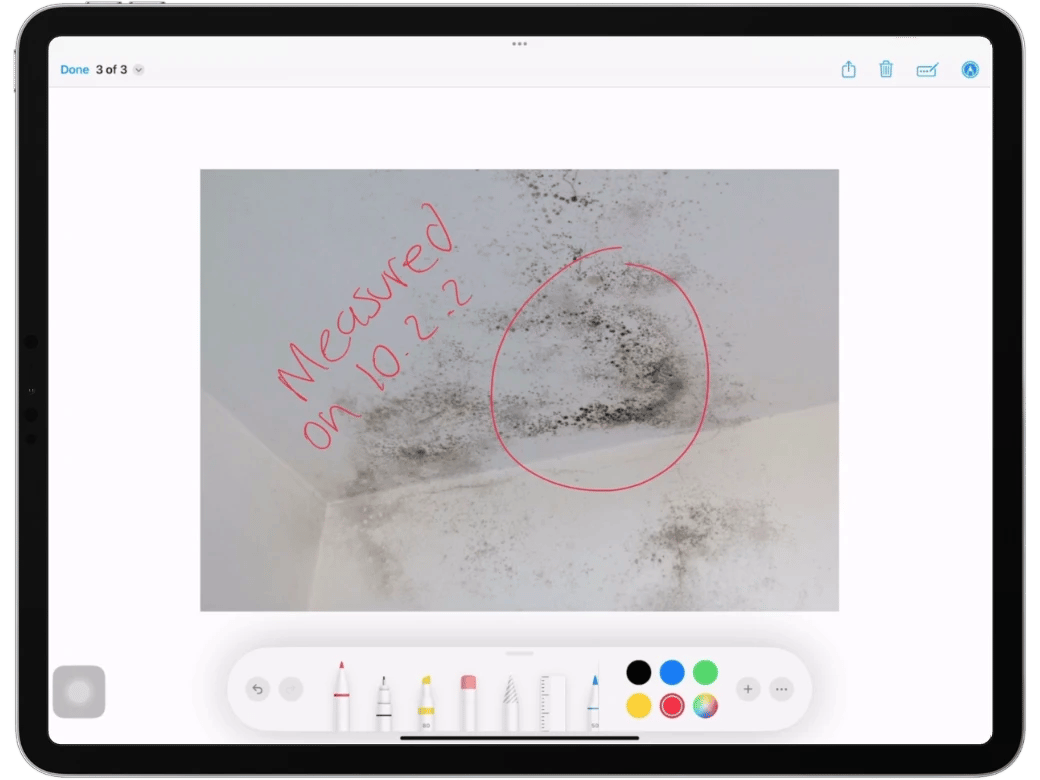
- Capture Photos: Use magicplan to snap photos as you scan. This helps in capturing any damage, repair needs, or unique features, directly linking these visuals to the scanned area for a more accurate and understandable estimate.
- Annotate Photos: After taking a photo, enhance it with magicplan’s markup feature to add notes or tags. These annotations can be linked to specific parts of your floor plan, providing clear context and supporting a smoother estimation and restoration process.
Sending a magicplan Sketch to Xactimate®
Sending a magicplan sketch to Xactimate streamlines the estimation process for any restoration job. Here’s a simplified guide to efficiently transfer your work from magicplan to Xactimate:
1. Finalize Your magicplan Project: Ensure all rooms are accurately scanned and adjusted, photos are taken and annotated, and any relevant notes or details are added.
2. Initiate the Export Process: Go to "Files & Sharing" in magicplan. In the pop-up, tap "Configure" next to the export option and enable the toggle for including photos. Each photo adds about 5 seconds to the export time.
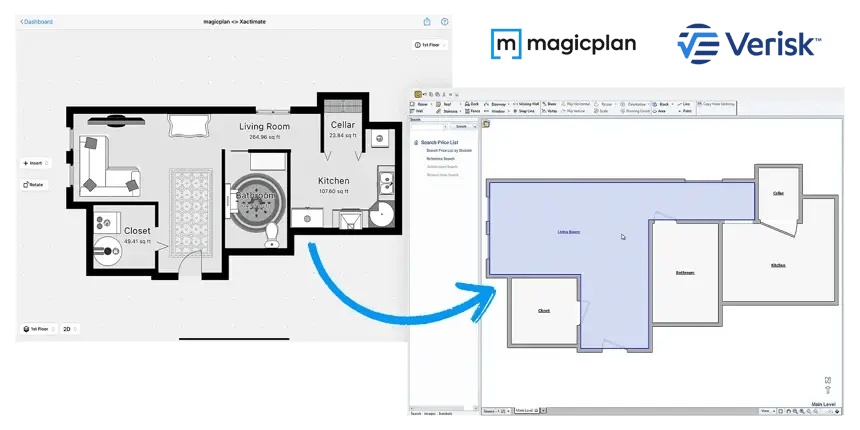
3. Choose Xactimate as the Export Destination: Select "Verisk" export option. In the next pop-up, choose the project you wish to export to Xactimate.
4. Complete the Export: Confirm the claim details and proceed. magicplan will send the data to Xactimate, and you'll be notified once the export is complete.
5. Access Your Data in Xactimate: In Xactimate, open the exported project. Review the magicplan sketch under "Estimate" > "Sketch" and access the photos under the "Photos" section.
By following these steps, you can efficiently integrate magicplan sketches into your Xactimate projects, enhancing your estimation accuracy and project turnover.

Benefits of the Integration
Integrating magicplan with Xactimate® brings a slew of benefits aimed at making the lives of restoration and insurance professionals a bit easier. Here’s a breakdown of what this powerful duo can do:
- Streamlined workflow: Moving sketches and photos from magicplan directly into Xactimate cuts out the middleman. No more juggling files or manual entries, just smooth sailing from the field to your final figures.
- Saving time: While some tools boast about instant floor plans, they often still take hours to deliver results. magicplan, on the other hand, changes the game by providing floor plans in real time. This immediacy not only shaves hours off your project timeline but also allows you to move on to your next task with no lag, making it a true time-saver in your toolkit.
- Better accuracy: Thanks to magicplan’s tech, you get floor plans that really reflect reality. When these get into Xactimate, you’re looking at estimates that hit closer to home, reducing back-and-forth and guesswork.
- Leaner costs: Trimming the fat on overhead by ditching extra software or data wrangling tools puts you in a better spot to offer competitive rates without cutting corners.
- Happy clients: You are in the business of helping people, and having a tool that allows you to act quickly and resolve their claims smoothly not only benefits them but also makes it easier for them to navigate this difficult time in their lives.
By combining magicplan and Xactimate®, you simplify the whole process from documenting damage to creating estimates. I've covered the essentials, from starting claims to scanning sites, all to ensure your workflow is smoother and your results more accurate. In the end, it's about getting the job done right, with less fuss and more confidence.
READ MORE:
Restoration Contractors: Watch Out for These 12 Hidden Costs
Best Practices for Selecting and Applying Line Items in Xactimate®

Benjamin Brown
Sales Consulting Manager
Blueprint to Faster Mitigation Estimates Guide
Learn how to master Xactimate® for mitigation estimates.

Share article