Restoration
/Inside magicplan
When dealing with water damage, it is important to keep track of the placement and progress of your drying equipment. In such cases, using an app like magicplan can be very helpful. It can help you document the areas with moisture, which makes it easier for you to figure out the best placement for your equipment, such as dehumidifiers and air movers. In the following steps, we will explore a detailed process to ensure thorough and effective drying documentation from start to finish.
1) Site Sketch and Moisture Mapping
2) Setting Up the Drying Chamber and Equipment Calculations
6) Exporting and Customizing the Drying Report
1) Site Sketch and Moisture Mapping
Moisture mapping is a critical first step in water damage restoration pinpointing the exact locations and extent of moisture within a structure. This process is essential because it guides restoration efforts, ensuring that drying equipment is effectively placed and that all wet areas are addressed, preventing mold growth and structural damage. Here are the steps to create accurate moisture mapping:
Creating a Sketch with Real-time AR Scanning: Begin by using magicplan’s Auto-Scan feature to create an accurate sketch of the site. This real-time mapping allows you to quickly generate a floor plan of the affected area.
Determining and Documenting Affected Areas:
- Utilize magicplan’s annotation shape feature to pinpoint areas with moisture presence. You can draw directly on the floor plan to outline where water damage is observed.
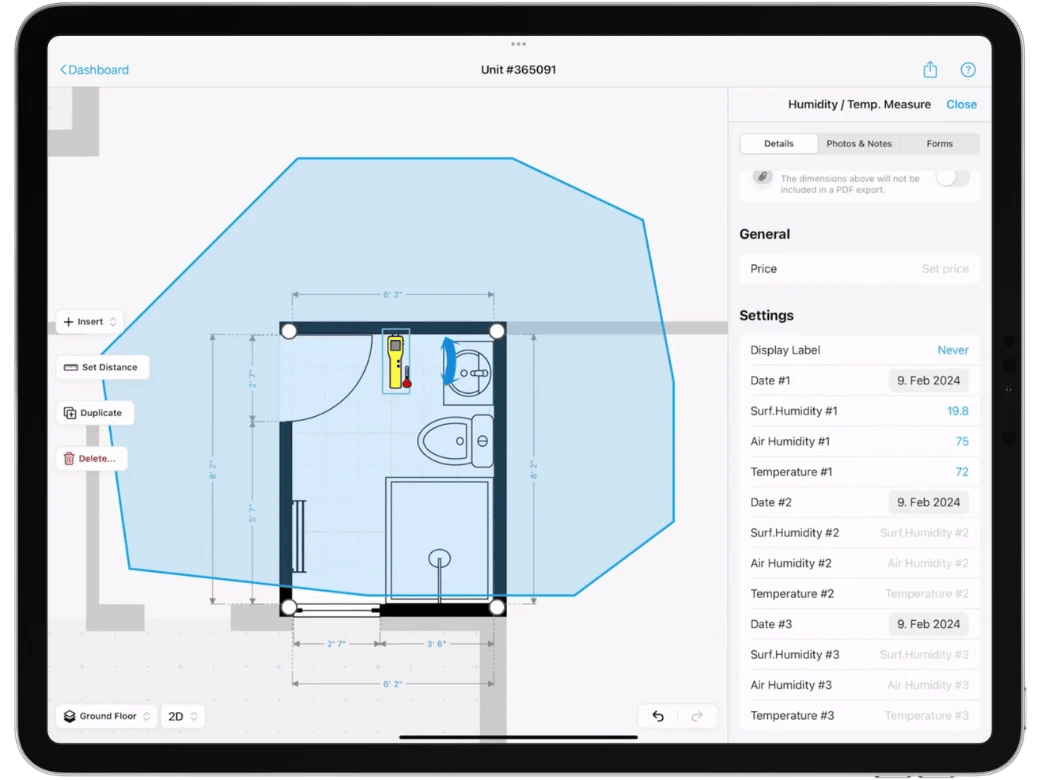
- Mark specific moisture points by adding "Humidity / Temp. Measure" objects across all the humidity zones. To maintain a detailed record of moisture levels, you can log the moisture readings, along with the date of measurement, relative humidity, temperature, and even include the affected material type in the notes section. Additionally, you can attach photos of the moisture meter readings to guarantee that no detail is missed.
magicplan Features Used:
- AR Scanning feature for floor plan creation.
- Annotation shape for outlining moisture-affected areas.
- Humidity / Temp. Measure object
2) Setting Up the Drying Chamber and Equipment Calculations
After mapping moisture, the next step is setting up a containment area and calculating the right size for your equipment. This phase is vital for focusing your drying efforts and ensuring your tools work as efficiently as possible. Let's dive into how magicplan facilitates this process.
Documenting the Drying Chamber:
- The containment area can be mapped out directly in the app. Use magicplan to define the boundaries of the drying chamber or containment zones.
- Create a custom form for the containment area, where you can select the rooms involved, add photos, and note additional details to ensure a comprehensive documentation.
Equipment Calculation:
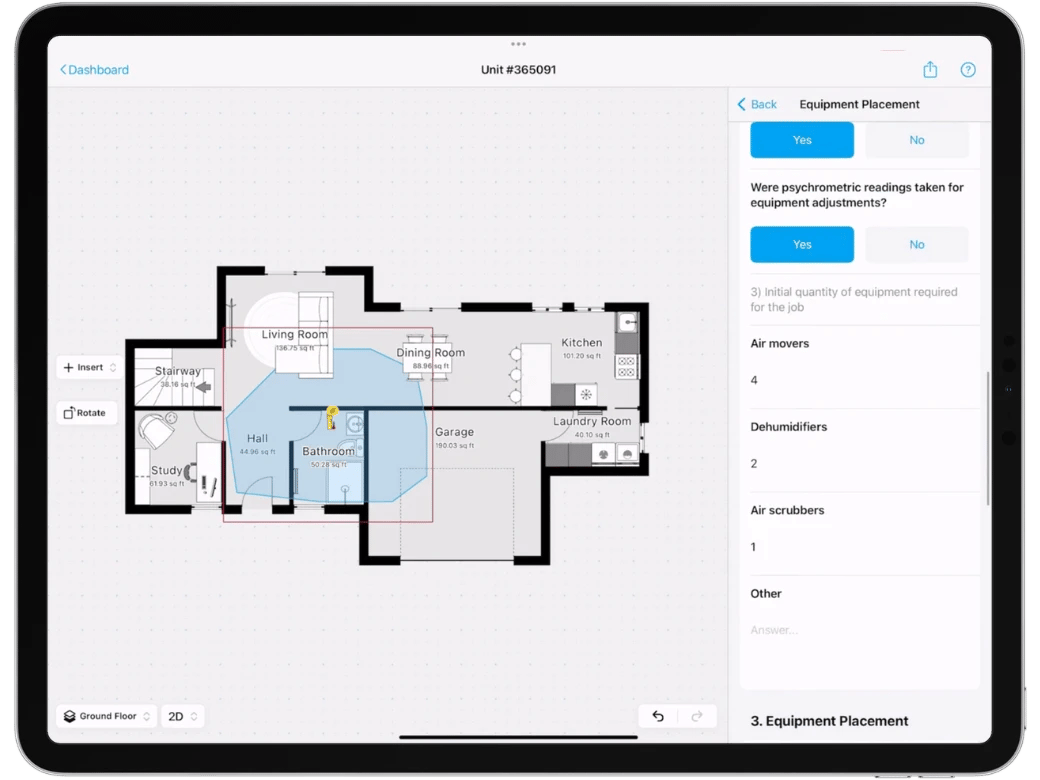
- Proper equipment sizing is crucial from day one. Utilize IICRC S500 equipment calculations to determine the necessary capacity for dehumidifiers (e.g., needing 55 pints of capacity), air movers, etc., based on the size of the area and the extent of moisture present.
- Adjustments should be made based on psychrometric readings to ensure optimal drying conditions.
magicplan Features Used:
- Custom Forms for containment area documentation.
- Annotation objects for mapping out containment zones.
3) Drying Equipment Placement
With the containment area set and equipment calculated, the next step focuses on the strategic placement of your drying equipment. Let's explore how to optimize equipment placement for the best possible outcomes in your restoration project.
Using magicplan’s Object Library and Custom Object Manager:
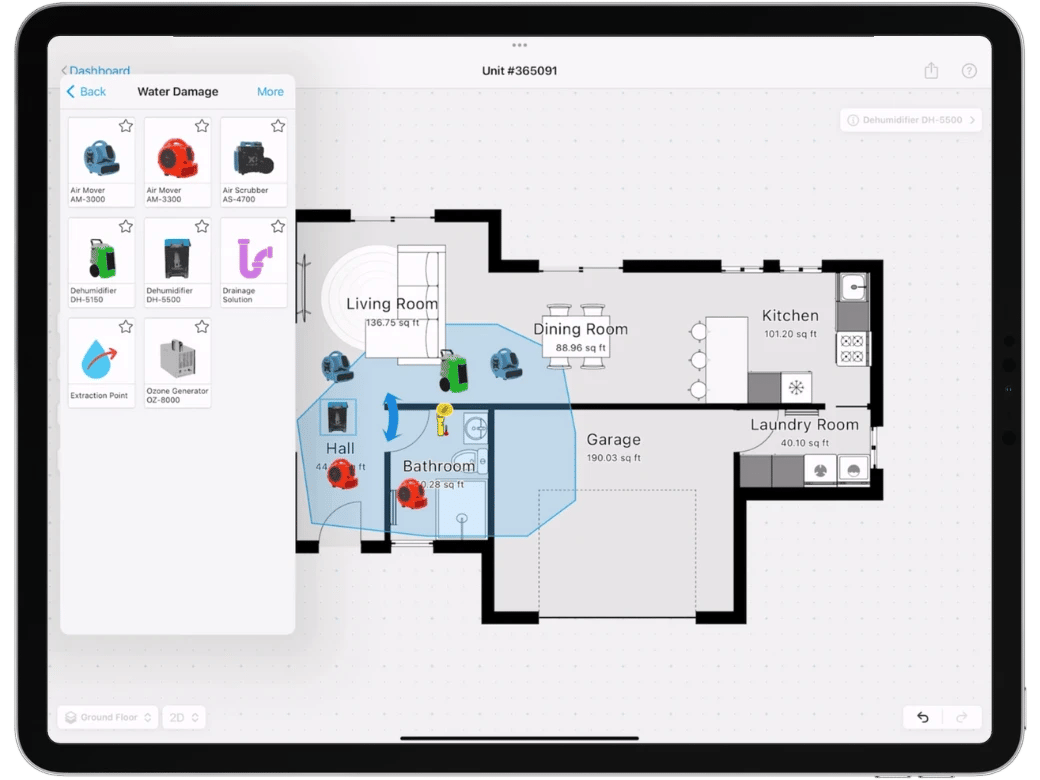
- magicplan’s object library includes a variety of restoration objects, such as dehumidifiers and air movers. For equipment not found in the library or to add equipment specific to your business, use the Custom Object Manager to upload these tools as objects.
- Document equipment placement within the app by positioning the custom objects across the affected areas identified during the moisture mapping phase.
Strategic Placement for Efficient Drying:
- The placement of each piece of equipment is key to achieving the desired drying conditions. Consider the type of equipment and its specific use case, such as using LGR dehumidifiers for industrial conditions or air scrubbers to maintain air quality.
magicplan Features Used:
- Custom Object Manager for uploading personalized restoration equipment.
- Standard restoration objects from the objects library.
4) Equipment Readings
After positioning your equipment, it's essential to monitor their performance. Here's how you can track operational data with magicplan.
Adding Custom Attributes to Equipment Objects:
- For dehumidifiers and other crucial equipment, create Custom Attributes to document important operational data such as temperature, relative humidity (RH%), hours running, along with the ability to attach photos and notes. This ensures that all relevant information about the equipment's performance and condition is easily accessible.

magicplan Features Used:
- Custom Attributes for detailed equipment tracking and documentation.
5) Custom Checklist for Standard Operating Procedures
One way to improve efficiency and ensure best practices during restoration is by implementing standard operating procedures (SOPs) through custom checklists.
Creating a Custom Form Checklist:
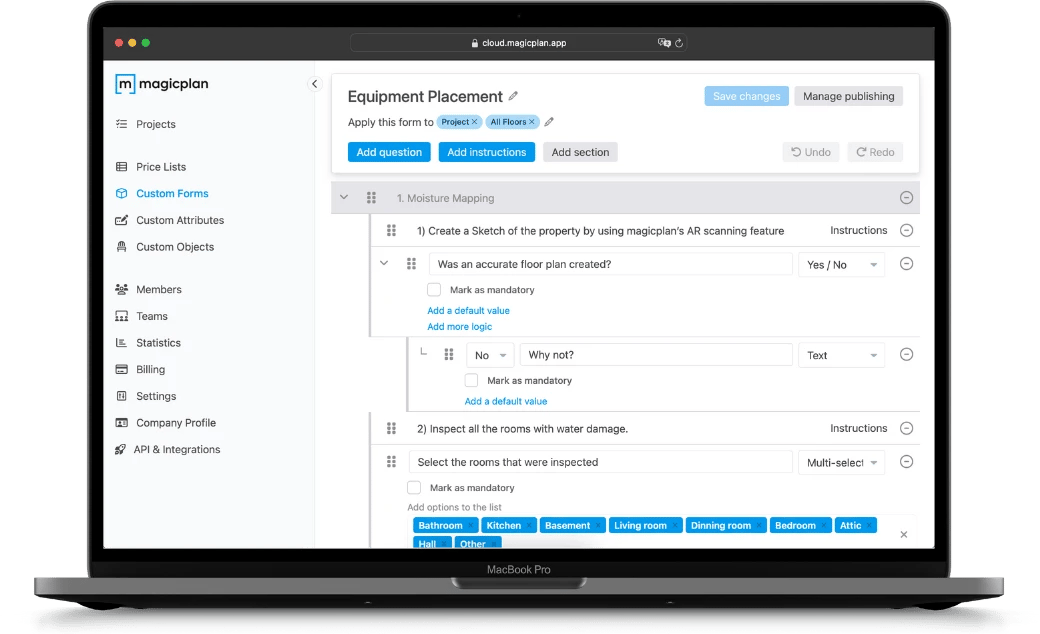
- To ensure consistency and efficiency in your restoration processes, create a Custom Form checklist in magicplan. This checklist can include different question types to standardize the assessment and restoration process, such as verifying equipment sizing, ensuring proper placement, and confirming that all necessary steps are followed.
- This standardization is crucial for scalability, allowing your business to maintain high standards across multiple projects and teams.
magicplan Features Used:
- Custom Forms for creating standardized operational checklists.
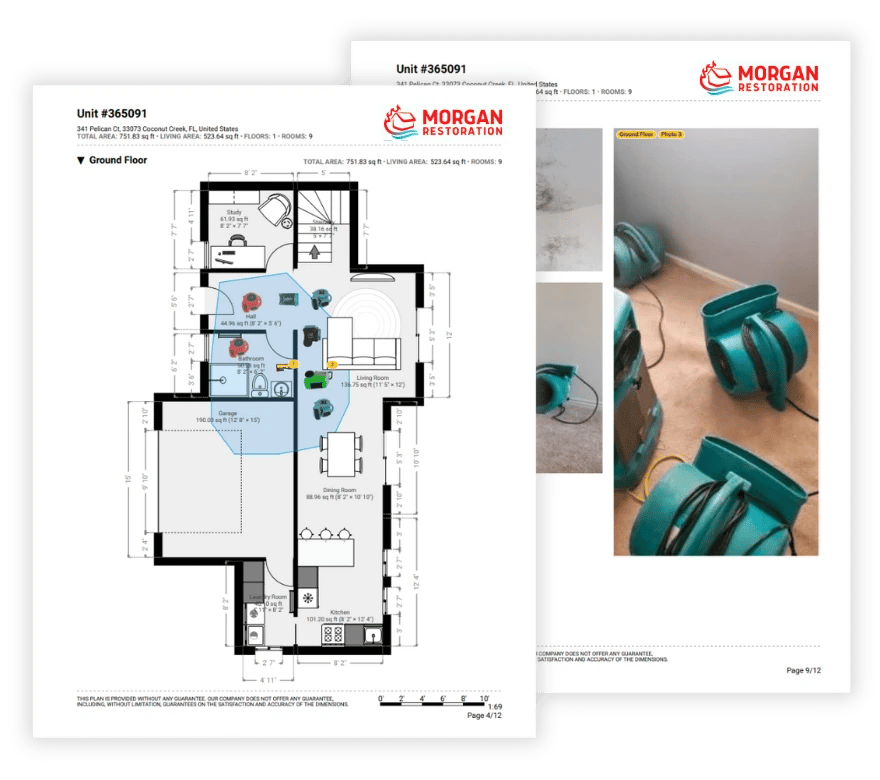
6) Exporting and Customizing the Drying Report
The culmination of your water damage restoration project using magicplan is the ability to export a comprehensive drying report PDF. This feature is invaluable for professionals needing to share detailed findings, progress, and conclusions with clients, insurance companies, or other stakeholders.
Leveraging magicplan’s Report Feature:
- magicplan allows for significant customization of this final report. You can include all aspects of your project, from moisture mapping to any type of water damage assessment, detailed equipment for water damage restoration placement, drying logs, and much more.
- Once your report is ready, magicplan facilitates easy sharing options, allowing you to email the document directly from the app or share it through other channels. This ensures that all relevant parties are kept in the loop regarding the project's status and outcomes.
magicplan Features Used:
- Report export feature for generating water damage reports and mitigation reports.
- Direct sharing options for distributing the report to clients, adjusters, or team members.
By following this detailed guide and utilizing the specific features of magicplan, water damage restoration professionals can ensure a thorough, efficient, and effective restoration process. From the initial assessment and moisture mapping to equipment placement and monitoring, magicplan streamlines every step, ensuring that restoration projects are completed successfully and standards are consistently met.
READ THESE RELATED ARTICLES:

Bernd Wolfram
Head of Product
Uncovering Hidden Moisture
The Ultimate Guide to Inspecting and Reporting on Moisture Intrusion.

Share article